Stitch chat screenshots into one long image
A long conversation takes several screenshots. Join them into one tall image with the repeated parts removed, in your browser with no upload.
By the operator of Dotori Tools4 min read
Open Screenshot StitcherA chat about a moving date and a quote runs past one screen quickly. Capturing it takes several screenshots. Joined into one image with the repeated parts cut out, they read from top to bottom in one go.
The steps are the same for any chat app. The pictures use a made-up conversation.
What you need
- Several screenshots of the chat (PNG, JPG or WebP).
- The Screenshot Stitcher open in a browser on your phone or computer. The tool says “Nothing is uploaded.” The screenshots are joined on your own device.
1. Capture with overlap
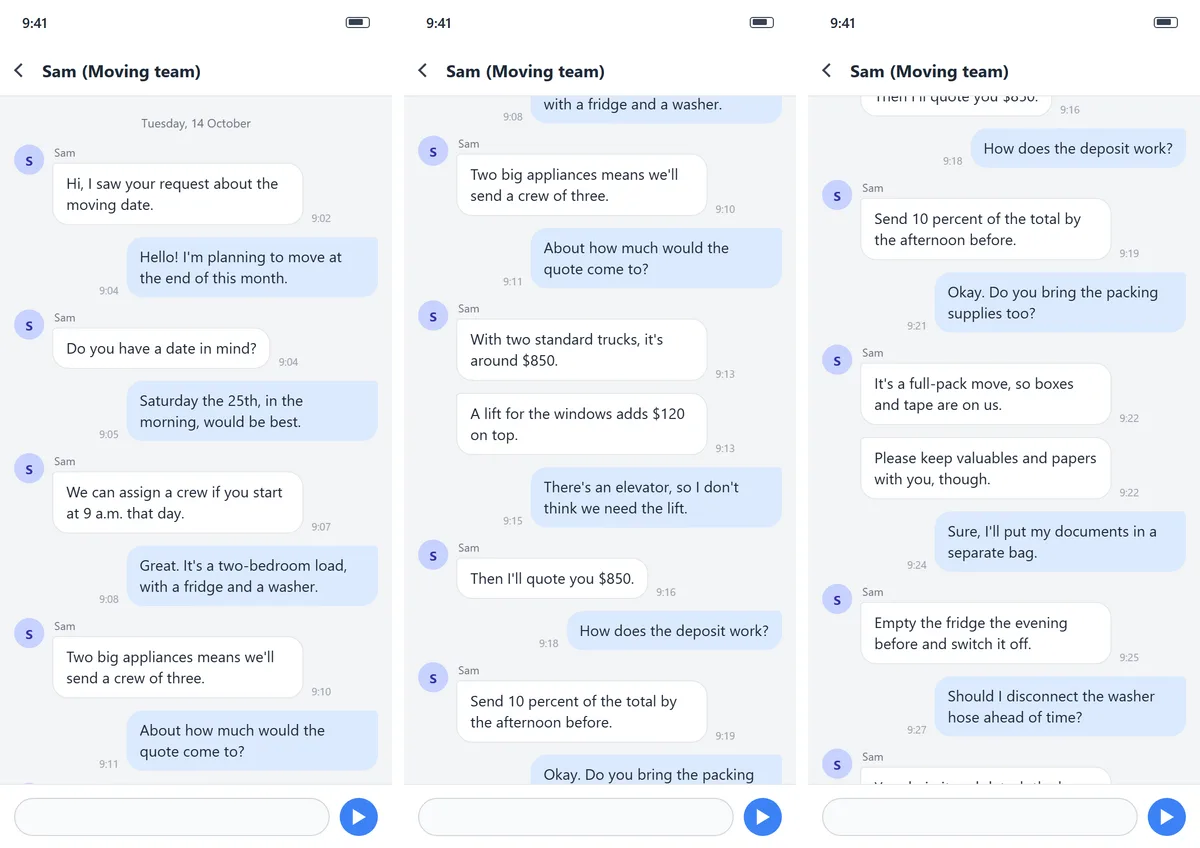
Start with the first message you want near the top. Scroll a little less than a full screen between screenshots, so the last messages of the previous image stay visible.
My three screenshots are each 780 × 1688 px. The bars at the top and bottom take 192 px and 128 px, which leaves a scrolling area of 1368 px. I scrolled 960 px between screenshots, so neighbouring screenshots share 408 px, about 30% of that area.
2. Add the screenshots
Drop the files onto the box that says “Paste screenshots one after another (Ctrl+V), drop them here, or click to choose”. On a phone, tap the box and select all the screenshots at once.
The tool numbers them in the order added, with number 1 at the top. If the order is wrong, click “By name” (it works when the file names follow capture order). If you captured the chat from the newest message backwards, click “Reverse”.
3. Check the joins
The preview shows a dashed line at each join. Under “2. Joins”, both rows, 1 → 2 and 2 → 3, said “overlap found”. On a phone this list sits below the preview.
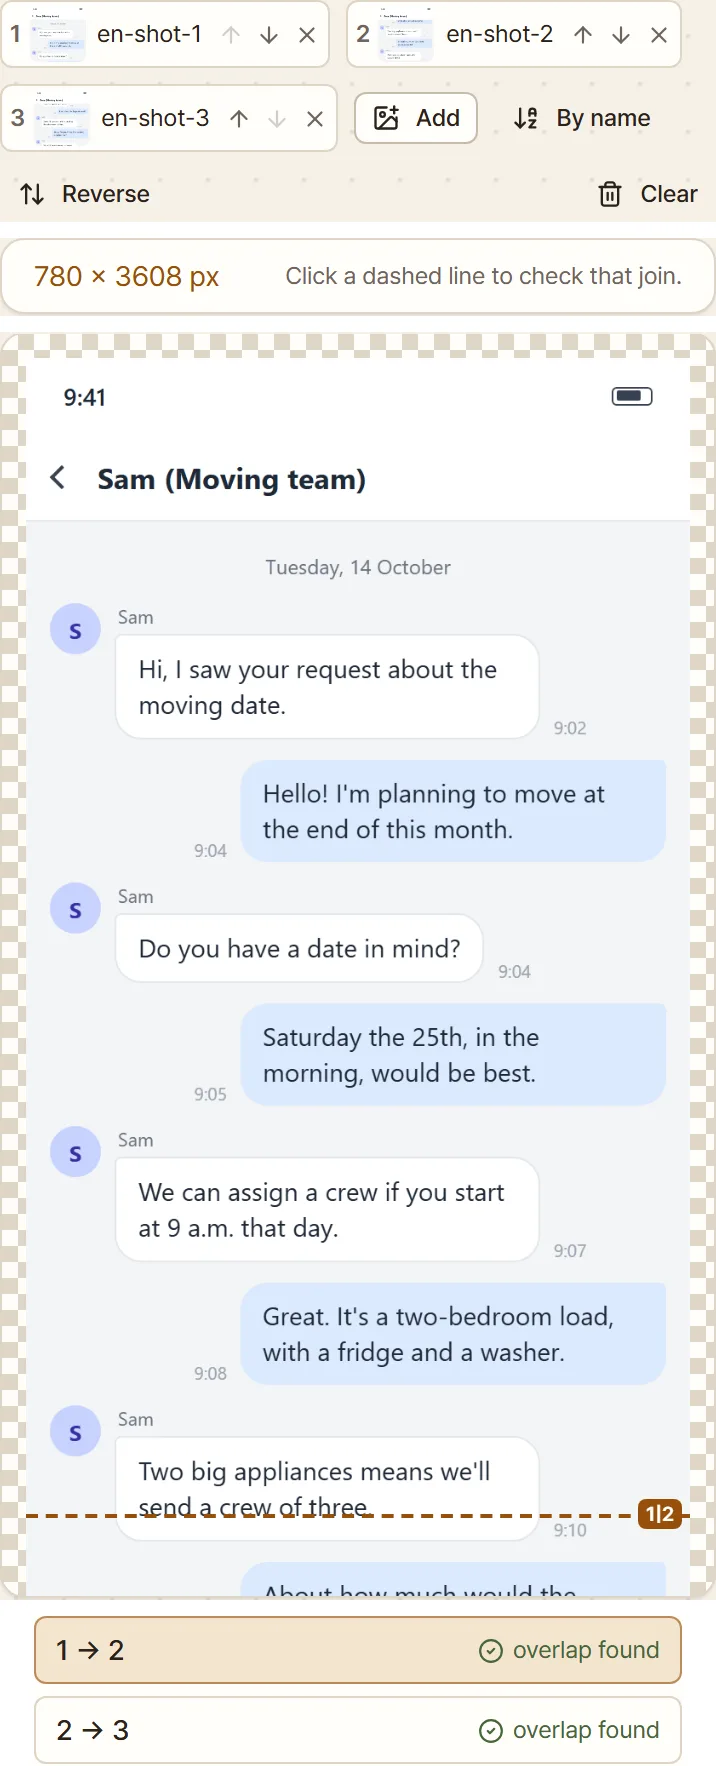
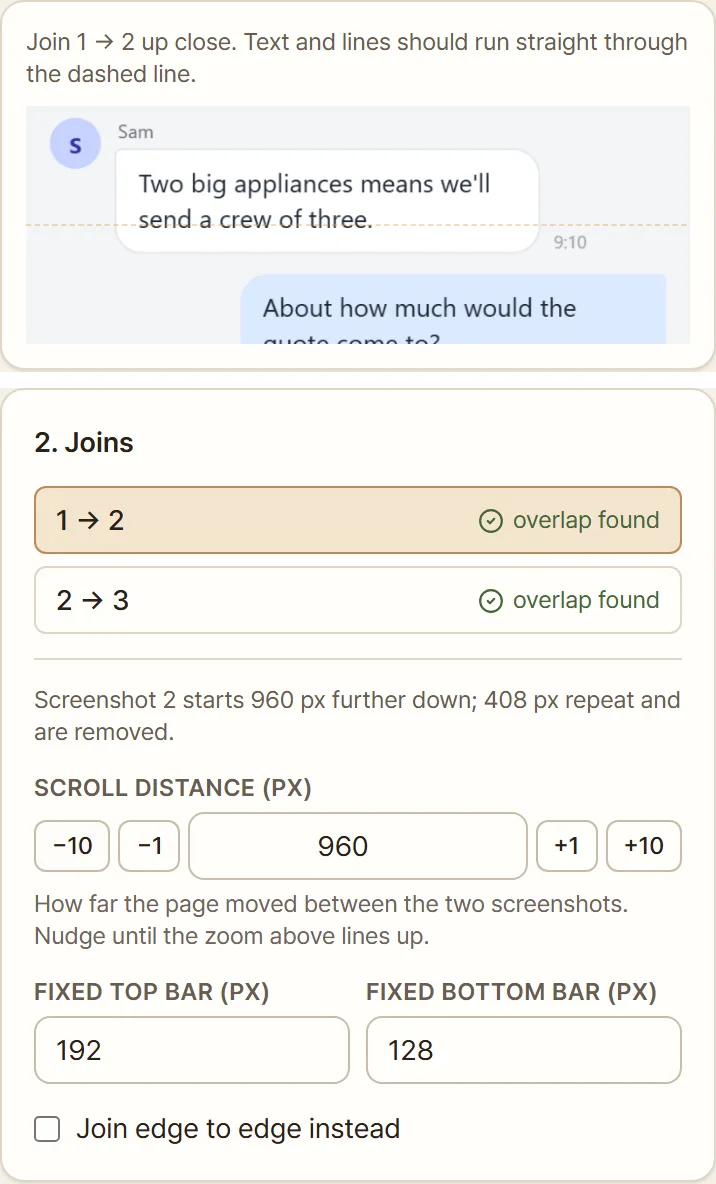
Click a dashed line, or a row in the list, to look at that join up close. The note above the close-up says “Text and lines should run straight through the dashed line.”
The line under the list read “Screenshot 2 starts 960 px further down; 408 px repeat and are removed.” The 2 → 3 join gave the same numbers. The 960 px is the “Scroll distance (px)” value: how far the chat moved between screenshots. Of the 1368 px scrolling area, 960 px is new and 408 px repeats the previous image, so it is cut.
“Fixed top bar (px)” showed 192 and “Fixed bottom bar (px)” showed 128, filled in by the tool. These parts sit in the same place in every screenshot. The result keeps the top bar from the first one and the bottom bar from the last.
4. Download
The first time you use the tool, the defaults are “Remove overlap”, “Top to bottom” and PNG. On a phone, use the “Download PNG” button in the bar at the bottom of the screen. On a computer, the same button is at the bottom of the settings.
The tool then says “Done. 3 screenshots joined into 780 × 3608 px.” My file was named en-shot-1-stitched.png: the first screenshot’s name with -stitched added.
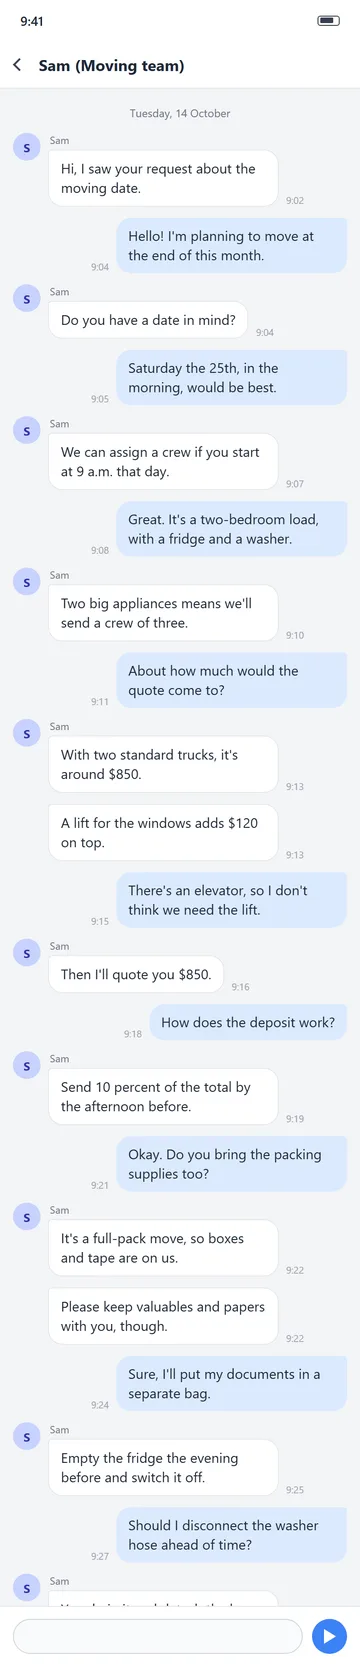
The last message is cut off because my third screenshot ended there.
When it does not work
The row says “no overlap, joined”. The tool placed the two images end to end. Causes are a missing section of the chat, too small an overlap, or an overlap of blank background. Capture again with more overlap. If the images do overlap, type a number into “Scroll distance (px)” and use the −10, −1, +1 and +10 buttons until the close-up lines up.
The row says “please check”. The tool found a position but is not sure of it. A repeated pattern in the overlap lets several positions fit almost equally well. Look at the close-up, and if the text is misaligned, adjust “Scroll distance (px)”.
The result is very large. With many screenshots, the tool says “Reduced to” and a percentage, and the image gets smaller. Browsers can save an image only up to a certain size, and the limit is lower on iPhone and iPad. If the text turns blurry, change “Format” to “PDF”.
The screenshots have different widths. The tool says “Shots of a different width are scaled to match the first one.” Check whether a screenshot taken with the phone turned sideways slipped in.
Before you send it. To cover a phone or account number the recipient does not need, use Face Blur & Pixelate and drag over the area.
Your settings look different from this guide. The tool remembers your settings between visits. Click “Reset settings” at the bottom of the settings to start again.
How the overlap is found
The tool compares neighbouring screenshots one row of pixels at a time. First it counts the rows at the very top and bottom that are identical in both images. Those are the fixed bars. Then it slides the rest against each other to find the best fit, and the cut is made in the middle of the overlap.
One clear best fit gives “overlap found”. A weaker fit, or a second position that fits almost as well, gives “please check”. No fit gives “no overlap, joined”. A short overlap leaves fewer rows to compare, so the tool trusts it less. For an unsure join, it also tries the distance from a confident join. So scroll about the same amount each time and leave plenty of overlap.
Try it with your own file. Nothing is uploaded.
Open Screenshot Stitcher