Remove a photo's background in your browser
Cut an item out of its photo for a resale listing, a shop page or a slide. Save it on white as a JPG or as a transparent PNG, and fix what the AI missed.
By the operator of Dotori Tools5 min read
Open Background RemoverYou are selling a bag online, and the photo shows your floor behind it. A listing looks cleaner with the item on plain white, and a slide needs it on its own. The usual problems are background left at the edges, a file too big to upload, and a transparent image that comes out with a white box around it.
This guide removes the background with the Background Remover and saves the result on white as a JPG and transparent as a PNG.
What you need
- The photo. The example is leather-bag.jpg, a bag on a forest floor, 5472 × 3648 pixels and 7.8 MB.
- A computer browser. The tool page says “Runs on your device. Nothing is uploaded.” I logged the page’s requests while it worked. None sent the photo; the ones I saw fetched this site’s own page code and AI files. Visit statistics and ads are covered on the privacy page.
1. Add the photo
Drag the photo onto the page, or click the dashed box to choose it.
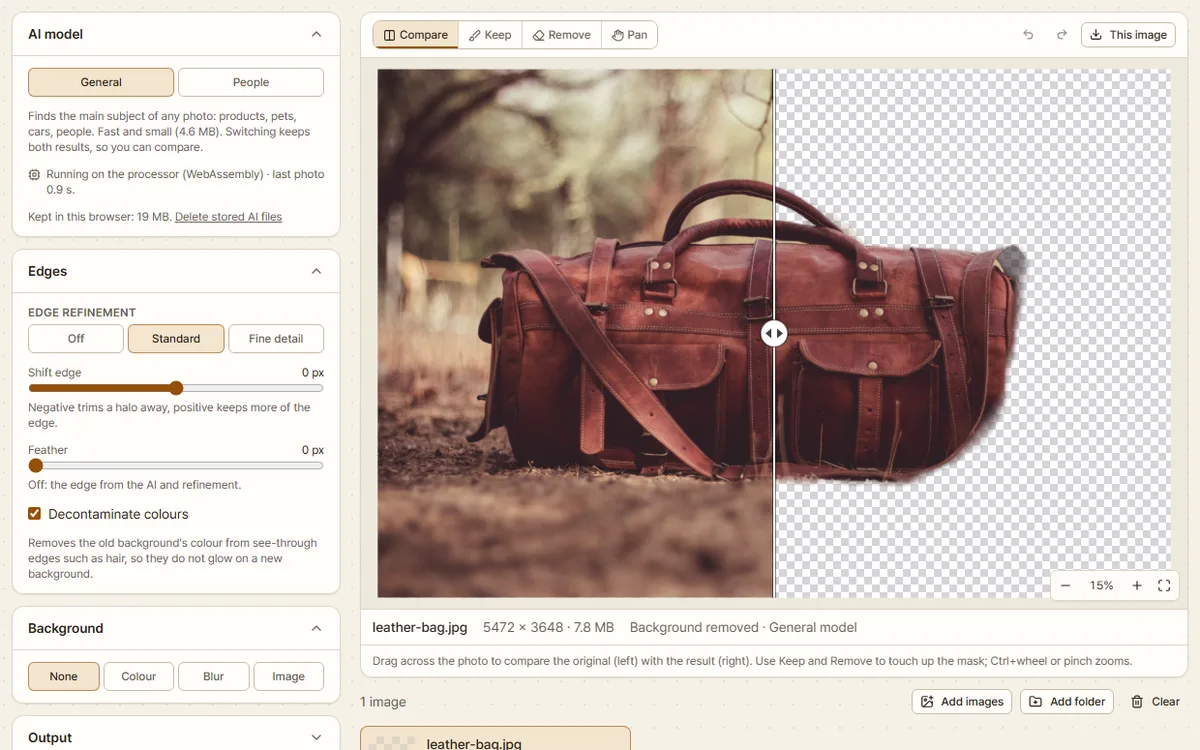
The first photo also downloads the AI, once. The panel estimates about 31 MB, but a browser without graphics card support gets a smaller build. The test browser showed “Downloading the AI: 14 MB of 19 MB…” and then “Running on the processor (WebAssembly) · last photo 0.9 s.”
The “AI model” starts on “General”. “People” is for portraits with fine hair and does not suit products.
When the line under the photo says “Background removed”, it is done. Left of the divider is the original; right of it is the result.
2. Check and fix the edges
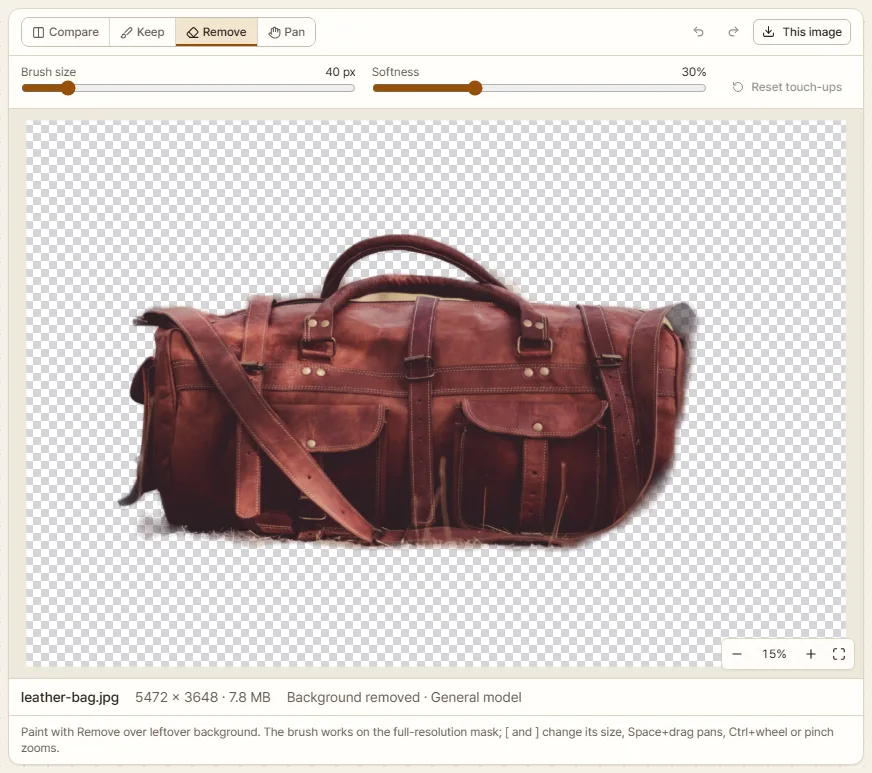
Click “Remove” above the preview. The divider goes away and only the result shows, on a checkerboard.
In the example, some grass stayed under the bag, and the top of its right end was left as a see-through grey patch.
Paint leftover background with “Remove” and wrongly removed parts with “Keep”. The “Brush size” starts at 40 px and the “Softness” at 30%. After one stroke the line under the photo read “Background removed · 1 touch-up”, and the undo arrow (Ctrl+Z) took it back.
For a thin rim of background, open “Edges” and move “Shift edge” below zero. At -10 px the grass under the bag got fainter but did not disappear.
3. Choose the background
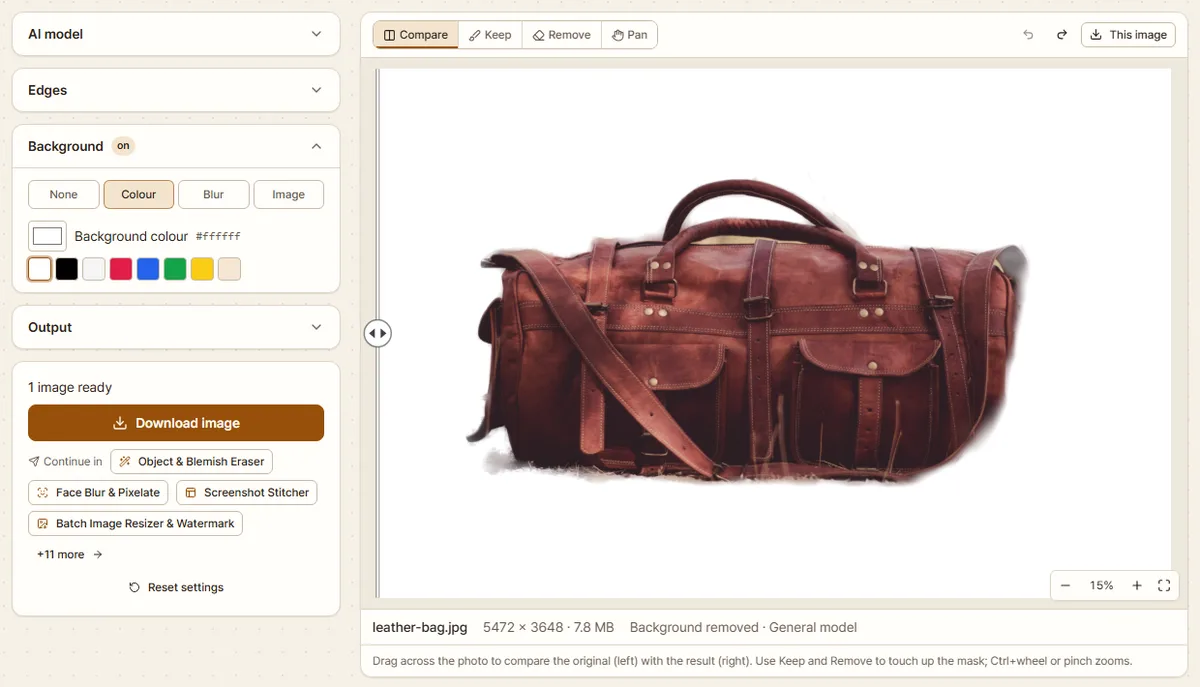
Under “Background”, “None” keeps it transparent and “Colour” puts the item on a solid colour. The “Background colour” starts as #ffffff, which is white. Drag the divider all the way left to see the whole result.
4. Set the format and download
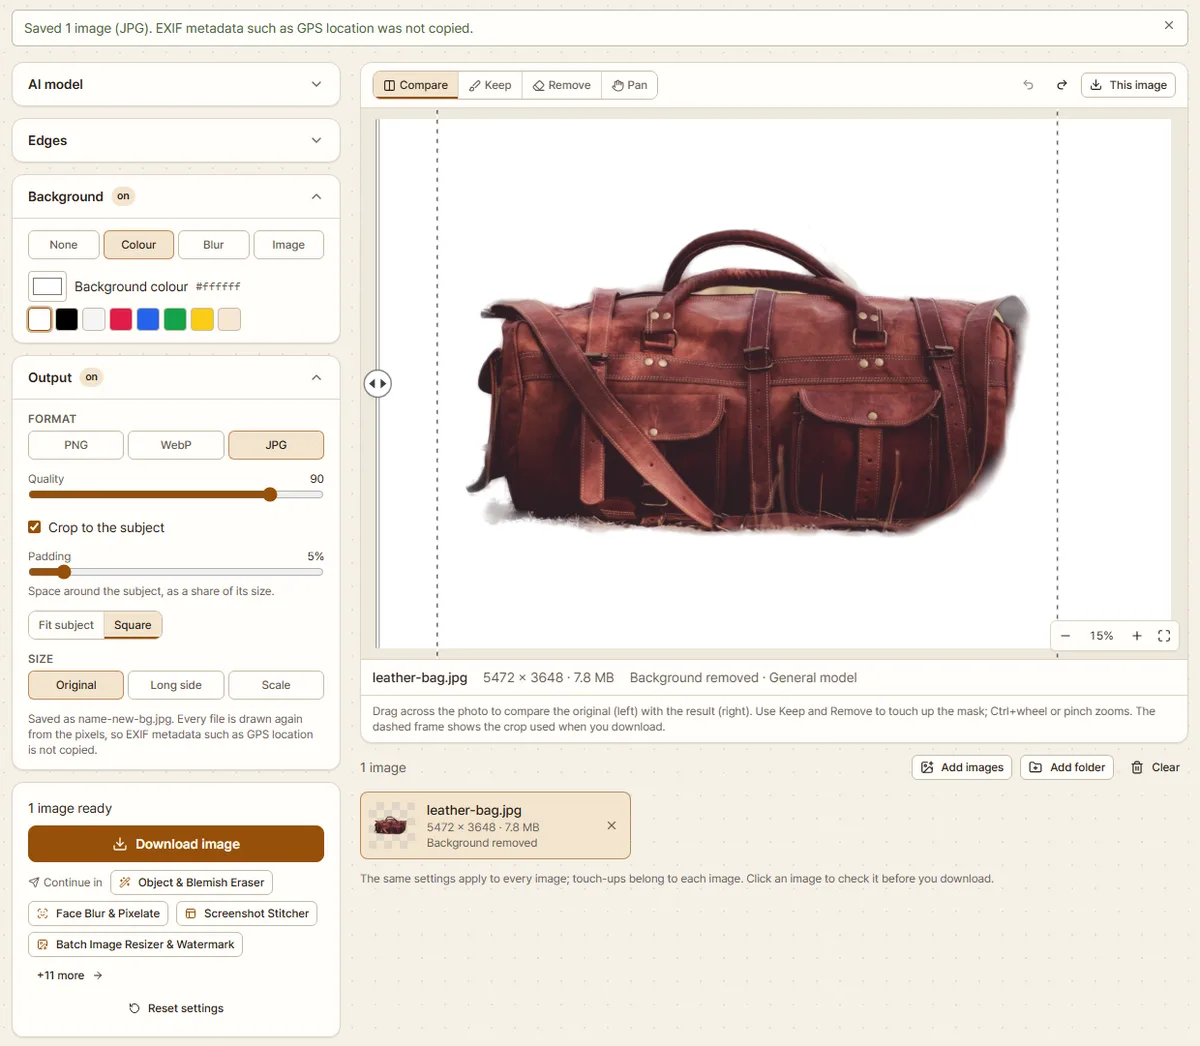
Open “Output”. For the listing I chose “JPG” under “Format”, ticked “Crop to the subject” and clicked “Square”. The dashed frame in the preview shows what will be saved. “Padding” starts at 5% and “Quality” at 90.
I clicked “Download image”. The file leather-bag-new-bg.jpg was saved and this line appeared at the top:
Saved 1 image (JPG). EXIF metadata such as GPS location was not copied.
For a slide, set “Background” to “None” and “Format” to “PNG”, and untick “Crop to the subject”. The file is then named leather-bag-no-bg.png.
Check the result
The white JPG was 4281 × 4281 pixels and 1,141,878 bytes. The square is taller than the photo, so the empty space above and below was filled with white.
With “Long side” under “Size” (1600 px by default), the file was 1600 × 1600 pixels and 198,208 bytes.
The transparent PNG kept all 5472 × 3648 pixels and came to 12,290,136 bytes, larger than the original JPG. Measured pixel by pixel, 68.4% of it was fully transparent.
When it does not work
You saved it transparent and it has a white background. JPG cannot store transparency. With “None” and “JPG” together, a “JPG background” colour appears, and the background is filled with it (#ffffff). Choose “PNG” or “WebP” instead. The save message then says “PNG with transparency”.
An iPhone photo will not open. A HEIC copy of the example gave a message that the browser cannot decode HEIC/HEIF. As it suggests, open the photo in Safari or save a JPG copy first.
The first run is slow. The first photo waits for the AI download. After a reload the tool showed “Starting the AI from this browser’s storage…” and did not download the AI again. “Delete stored AI files” removes the stored copy.
The item and the background have similar colours. The edge tends to stay soft, like the bag’s right end. Paint it with the brushes. For hair or fur, set “Edge refinement” to “Fine detail”.
Settings from last time are still on. The tool remembers the model, edge, background, format, crop and size settings in this browser, but not your photos or brush strokes. After a reload “Background” and “Output” showed “on” next to their names. “Reset settings” at the bottom restores the defaults. Each download also adds a line with the settings used to your history, saved to your account when you are signed in; photos are never stored. On the History page, untick “Record history” to stop this, or use “Clear this device” or “Delete all account history” to delete it.
How the cut-out works
The “General” model shrinks the photo to 320 × 320 pixels and marks the main subject. That rough mask is scaled up to the full photo, and “Edge refinement” fits it to the real edges. The see-through patch in the example sat where the bag was out of focus, in front of a tree of a similar colour; spots like that are easy to miss. Next time, keep the whole item in focus and use a plain surface of a different colour.
Photo: “Leather duffel bag on the ground” by Harsh Jadav, an Unsplash upload from before 5 June 2017 that Wikimedia Commons lists under CC0 1.0 (checked 17 October 2026). Source: Wikimedia Commons.

Try it with your own file. Nothing is uploaded.
Open Background Remover